Blog Post #16

Photo Editing - Is it necessary?

When we talk about editing in the context of photography, it can mean a number of things. For example it could mean the editing or culling of shots taken during a photography session to weed out the poor shots. It could also mean the editing of a collection of photographs down to a predetermined amount to fit a book or exhibition wall space. The most common interpretation though is the process of improving the quality and aesthetic appeal either in a darkroom or on a computer screen utilising software. It is this latter example of editing I plan to talk about in this blog post.

I operated in the world of what is now called “analogue photography” from the mid 1970s through to the late 1990s. Photographs were shot on film and processed and printed in a darkroom using various chemicals and graded papers. Film came in ASA ratings (ISO) and each film had its own sensitivity and characteristics that you could tweak during film processing. In the darkroom, very often many attempts were required to get a satisfactory print result, including the creation of exposure test strips and creating dodging and burning maps of the photo. Dodging and burning involved holding back or adding light from the enlarger lamp to lighten or darken parts of the image during exposure on to the paper.

The photographer would have an array of shaped pieces of cardboard on the end of fine wires to hold back the enlarger light to lighten parts of the image, and card with shaped holes in it to add more light from the enlarger to darken certain parts of the image, sometimes even shaping hands to create peep holes for the light to get through instead of the card method. These techniques enabled detail to be brought out in over and underexposed areas of the negative. The contrast of the image was determined by the grade of paper you selected or laterally by using multi-grade paper and specialist filters in the enlarger.

Having processed, washed and dried your print it was now time to get rid of all the dust spots and hairs that the enlarging process produced, even though your negatives were scrupulously clean. This is called “spotting” and involves taking a very fine paint brush and adding “lamp black” pigment to the white spots on the print in the series of very fine spots, never strokes. For the dark blemishes the same brush could be used but this time to apply potassium ferricyanide in small amounts which had a bleaching effect. I can’t believe I am still here after all those years of licking the brush to form a point when using the “pot-ferri” as it was called. This is how I edited my work and there are still many photographers out there today using these processes to create photographs, but I think it would be true to say that the digital world of sensors and software now dominates.

Having gone through this “analogue” process countless number of times to produce a print, it baffles me when people now say “Oh I never edit my pictures, I display them as taken”. Why? We never did that in the darkroom days, there was always room for improvement to the final print.

The editing techniques explained above (whereby the image as shot is improved by the creativity and skill of the photographer creating the final image), draws direct parallels to the digital age, however film is replaced by sensors and the darkroom has been replaced by using a computer screen and working in a light-room. The software package I predominantly use is Adobe Lightroom. I have it as part of the photo imaging software subscription that also includes Adobe Photoshop. I will say right here and now that I have never used Photoshop and don’t see me ever using it. As well as being a monster of a package to conquer, I feel it comes into its own for manipulation rather than just tweaking quality and aesthetics on an image. I like my images to be predominantly “as shot” with minimal editing as opposed to being something created or manipulated by algorithms and multiple image layers.

Editing to me is a process that, when done correctly, is not obvious to the viewer of the final image. In order to maximise the opportunities from the digital editing process, I take all of my images in the Raw format. I then have a workflow process in Lightroom that allows me to make the photo the way I envisaged it.

I begin with getting the verticals into the correct orientation then crop the image to the way I want it. I will then use the basic panel to alter the characteristics shown in the image opposite if required. I will also dodge and burn using the adjustment brushes if required. I then ensure that the detail improvement facility renders the subject sharp. The final act is usually adding a vignette to hold the image in and accentuate the subject. I also use the tone curve feature to lift or lower tones in the image if necessary. I may also use a copy image created in Silver FX Pro2 as a starting point, when working in black and white, employing maybe a pre-set which is something I will discuss another time.

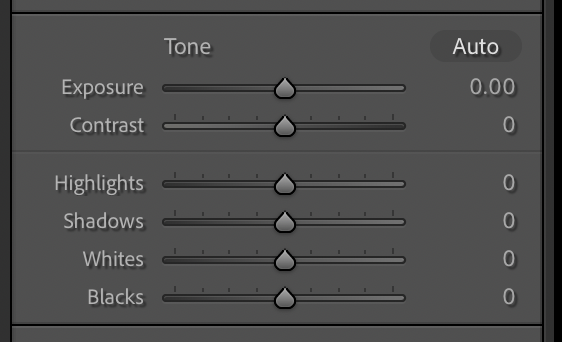
There are some people though that over-do the software editing and it becomes so obvious on the final image. One of the major culprits is the over use of the Clarity and Texture sliders. These can give distorted representations of colour and make them look flat and “muddy”. Another effect you can get by overuse of these effects and the Sharpness slider is “noise”. This appears like a haloing effect around the edges of the subjects in the image. Just as in darkroom work, you need to develop and study the skills required to produce a satisfactory final image when using software on a digital image.

As you can see, the techniques employed in editing the digital image in Lightroom are the same as when altering an “analogue” image in the darkroom. The major advantage of working in the digital world is that if you shoot using the Raw format the process is non-destructive. This means that no matter what changes I make to the original image in Lightroom, if I don’t like it I can just hit reset and start again. To do this in the “analogue” process is expensive in both time and materials and at times demoralising.

One other point. An increasing number of images we see today come from camera phone technology and some great examples of photography have been captured using these devices. If you have read my Blog Post #7 you will recognise the comment “The best camera you have is the one you have with you at the time”. When it comes to camera phones and their portability and ease of use this statement has never been more true. The principles of editing still apply when using camera phones. Storing hundreds of useless images, pocket shots, screen shots and multiple copies when using burst mode etc., will soon fill up your camera phone or cloud memory so weed them out. I very rarely share a photo taken with my camera phone without some minor editing using the camera phone software. It only takes a minute to correct verticals, crop, adjust exposure, contrast, shadow detail etc., and your photos will come across as a lot more professional looking.

So in summary I believe that some edits are usually necessary to make my photos look the way that I want them to be, whether it be using my Fuji cameras or camera phone to capture the image. Editing is not the same as manipulation. The later is where you make the image into something that it wasn’t when the shot was taken. I don’t use Photoshop, I have no need for it. For my street photography work I believe it is important to show life the way it is and by employing the same skills on a computer, as I did in my darkroom, I can make sure my work looks the way I want it to.

Thank you for reading this blog post. I’m sorry but I don’t include a comments or “Like/Dislike” button. If you want to contact me you can do so by using the “Contact Me” facility in the website header.

Peter Degnan

Previous
Previous

Blog Post #17

Next
Next

Blog Post #15